Since humanity could think, we’ve been creating. Art is as old as society itself, from cave paintings with berries and clay to oral tales passed down through generations. Now, as the modern world advances, so does art. Charcoal evolves into digital tablets, movies skip out on practical effects in favor of CGI, and theater expands from two people talking on a stage to a spectacular display of ingenuity and love for the craft.
The origins of theater as a space and community can be traced to ancient Greece, where the first plays were performed in front of an audience. There, playwrights birthed tragedy and comedy, three-act structures, and the power of community. It was known then as the common man’s artform because of its accessibility. Anyone, regardless of financial status, could perform in these communal events.
Recently, however, theater’s transformed from an accessible form of art to something of a luxury good. Tickets on Broadway have skyrocketed, and productions are now expected to be Tony-levels of extravagance. If not, they’re underfunded, under-marketed, and die out of relevancy before opening weekend is over. Volunteering thespians with only a small auditorium and an even smaller budget pour all their energy into a short-lived run of a musical that their local theater’s barely will make a profit on. High school and middle school kids must have perfect pitch and stellar props, taking the fun out of creation and performance.
Everything that is made must have a monetary advantage or else it’s not worth doing. Art is no longer seen as something for everyone’s enjoyment and even a necessity for a society to thrive and connect to one another. Rather, theater in particular is now seen as child’s play and only worth watching if it’s groundbreaking and expensive. Actors can barely afford to live, much less shuck out hundreds of dollars to buy tickets to their own shows. Those who can drop that kind of money for a matinee is small and buy them for the spectacle of it, not the art.
In the everchanging zeitgeist, many people believe these skyrocketing prices are justified. The work is disregarded because it’s not a necessity and seen as something luxurious instead of a way to connect with each other. Expectations for quality are also higher than ever.
But in a world that is more polarized than ever, only art can bridge the gap. Art allows people from different backgrounds to see stories from all around the world. Theater breeds community, creativity, and connection. It allows empathy to cultivate.
So, how does this change? Broadway’s prices won’t drop overnight, especially when those who can afford it will keep buying them, justifying those kinds of prices. But starting small—supporting community theaters, having bigger art budgets in schools—can have a great impact. Watch local shows, donate to nonprofit art companies, when possible, and even volunteer if you’re interested. Staying active in a community can allow art to thrive and show that theater is and always will be accessible.
The temperature’s dropping, the pumpkins are spicing, and folks all around the world are scrambling to make sure their Amazon purchases will be delivered just in time to be wrapped and placed under the tree before Christmas arrives. With that holiday joy making our hearts grow three times bigger, it makes sense to fill up the chilly air with some festive music. If your playlist is lacking this new year, never fear! Here are five new songs—and a musical, thank me later—to add to the queue for Christmas.
This December (Holiday Version) by Ricky Montgomery
This December is a winter classic, always making its rounds when the month begins, but this year it comes to us with a twist. Ricky Montgomery released a holiday version, complete with sleigh bells, twinkling chimes, and upgraded vocals. It keeps the spirit of the original alive while adding to its new Christmas-themed twin, allowing you to add not one but two great new songs to your playlist.
West Virginia Snow by Homemade Haircuts
A South Carolina-native, Homemade Haircuts have wowed us once again with this sweet indie single, West Virginia Snow. Its reminiscence of the holidays as a child is a theme that plenty of young adults are feeling these coming years, and brings up those feelings in a more positive note. It looks back with gentle drums and mandatory sleigh bells, a gateway song to nostalgia heaven.
Last Christmas by Jim and the Povolos
Back again with mandatory sleigh bells, Jim and the Povolos covered the always iconic Last Christmas. It keeps up the eighties style from the original but adds its pop-folk twist with alternating singers, a sweet synth, and angelic harmonies. Despite being done several times in the past, it’s refreshing to watch different musicians from all genres take this song and make it new in their own unique style.
Winter Waltzes by Kaden MacKay
A lesser known artist with angelic singing that shouldn’t be overlooked, Kaden MacKay is giving this season a somber acapella mashup of holiday classics. His voice is nostalgia personified. Winter Waltzes, a collection of songs wrapped in one harmonic package, will throw you back in time to simpler times, reviving that childhood wonder for a four-and-a-half minute stroll through a winter wonderland.
Although this isn’t a single, and not exactly from 2023, A VHS Christmas Carol is a timeless piece that can be listened to at any time. Created by Starkid Productions, with a live version free to watch on YouTube, this album is a modern retelling of A Christmas Carols with an eighties twist. Though it has less jingle bells and more synth, it’s sure to bring out the spirit of Christmas with no skips along the way. If you can’t get enough, the digital ticket for 2023’s expanded rendition is also available on their websites to rent until the end of the year.
It’s a modern trend to take a kid’s show or movie and mature it in a remake for its now-adult audience. Whether or not this is a success depends on the medium and the heart behind each project, but many original fans tend to stray away from most remakes of their beloved nostalgia-tripping shows.
Scooby Doo is not immune to this, having been adapted and revamped and parodied for decades now, and it seems like every iteration hits the same beats in order to tell a story that’s ‘never been done before.’ However, one diamond shines among the coals: a particular one-act play hidden in a nerdy corner of the internet, and its new holiday-themed musical sequel that refreshingly expands upon the mystery parody genre.
The Solve-It-Squad Returns, made by comedy trio Tin Can Bros in 2017, follows a kid detective team twenty years after their falling out when a familiar face from their past resurfaces and forces them to work together again. Conflicts arise, sandwiches are made, and in true Scooby Doo fashion, traps are set all to catch this not-so-new bad guy causing mayhem. After solving this decades-long mystery—I highly recommend checking out the show for yourself for the excellently executed twist at the end—they decide to stay together and reignite the Solve-It-Squad. This one-act play was well-received and has grown a deserved internet cult following in the coming years, even getting an off-Broadway production in 2018.
With three script reads of potential animated episodes made over COVID, the Bros returned in 2022 stronger than ever with a musical sequel: How The Grunch Cribbed Christmas. Yes, that’s the actual title. Acting as a fake charity livestream with diegetic nondenominational bangers, The Grunch keeps the spirit of its crime-solving roots and adapts a holly jolly tone to it. Be warned: there is plenty of mature themes and jokes in both, so if you’re young enough to still be watching Scooby-Doo, skip this one.
With absentee parents, quick changes up the wazoo, and a mysterious Grinch-esque monster running amuck that the Solve-It-Squad must unmask, there is something to satisfy diehard fans excited to see their beloved characters on stage again—and singing this time, no less—while granting enough context and novelty not to isolate anyone uninitiated to the Tin Can Bros universe.
The Grunch uses its small, intimate stage to its advantage by making crowd participation an active plot device. It engages different audience members for funny scenes while carrying out jokes to satisfy callbacks later. Because the audience is canonically present in the story, the characters are allowed to roam around and between the chairs, blurring the line between audience and actor.
The music, written by the talented Nick Gage, is fun and addictive to listen to, carrying a festive cheer throughout that is guaranteed to end up on your Christmas-Hanukkah-Kwanzaa playlist. It’s entirely in-universe as well, meaning plenty of holiday bells jingling and excellent staging by stage manager Tammy Babich.
This musical takes itself less seriously than its predecessor, having fewer emotionally driven scenes at moments it felt needed. Though it’s not a surprise, given its inspiration, they rely on the quirky, cartoonish humor most Scooby-Doo parodies tend to stray from to undermine what could’ve been powerful scenes if given breathing room. Coming off a play that held a better balance between the jokes and the serious scenes, this sequel is far more comedic, sometimes to its detriment.
However, the humor makes up for what it lacks in quiet moments. The Grunch still allows their characters time to show their growth between the two installments which feels like genuine progress. They’re played as actual people rather than caricatures of characters from another show. With a sweet but silly message, engaging audience interactions, and near-perfect performances by their small cast—seven people in its entirety, an upgrade from the whopping six from the first—How The Grunch Cribbed Christmas has all you need to make it onto your holiday movie list for years to come.
If there’s anything to know about drummers, it’s that we’re loud, both behind and away from the kit. But there’s a time and place for noise, and a thin-walled apartment is not one of them. RTOM’s Black Hole mesh practice set is perfect for musicians who want to avoid a complaint for their neighbors and still jam out in the comfort of their own home.
These muted pads maintain the stiff feel of a drum set while producing a fraction of the sound. It’s so quiet that your neighbors wouldn’t even know you were playing unless they saw you. The tension of the mesh pad is adjustable, just like tuning a regular drum, so it can be looser or tighter depending on your preference. They’re also easy to install; you just pop them on top of your kit and start playing, no assembly required.
Of course, the high price will deter many, especially college-aged drummers on a budget. For professionals and anyone playing long-term, though, the investment will pay off in the long run. While they dampen noise, other cheap brands lie directly on the drums heads, meaning they still create more sound than some might be comfortable with. The Black Hole hovers above the drum pads themselves, holding on from the metal rim, meaning there’s no chance for any resonance to shake the drums and make more noise than necessary.
On top of that, the mesh maintains a greater surface tension that allows drumsticks to bounce off the same way they do a regular drumhead. Other mute pads made of foam or plastic tend to cushion them, slowing you down while you play and taking away the stick’s essential rebound that allows you to play faster. These foam pads also can tear easily with use over time, while a few tightening fixes any lost tension the mesh pads have.
However, there is the glaring issue of no cymbal pads. This set is often suggested to be paired with a set of quiet cymbals, which can ramp up the cost an uncomfortable amount. The mesh pads can also be temperamental if you’re a heavy hitter. The kick drum, in particular, is susceptible to collapsing, eating up your time having to tighten the mesh every now and then.
Despite this, their high quality and longevity make the price well worth it if you’re interested in investing in these mesh pads. Once you buy them, they’re with you for the long run.
In the era of remakes and revivals, love for the slasher genre has returned with a vengeance. But while movie tickets sell out, a new contender comes to steal the spotlight: musical theater.
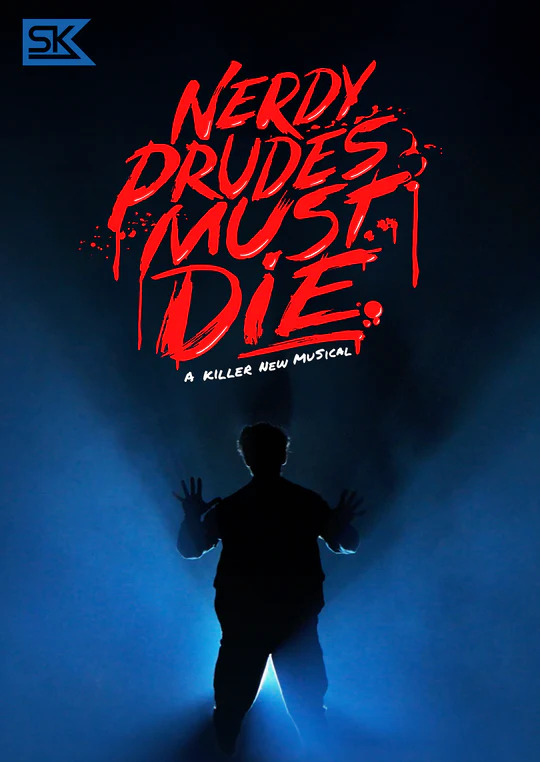
The third installment of the popular Hatchetfield series, Nerdy Prudes Must Die (also known as NPMD) is the latest production by Starkid Productions, written by genius brothers Nick and Matt Lang. This musical theater powerhouse has done several parody and self-referential musicals in the past.
This horror-comedy follows a group of nerds who seek revenge on their bully Max with a prank that ends in a fatal three-story fall. Unfortunately for them, Max returns as a vengeful ghost hellbent on killing the so-called nerdy prudes he blames for his death. Thus ensues a race against time for the nerds to find a way to stop Max while the local cops close in on them.
Despite being a part of a longer storyline, Nerdy Prudes Must Die balances callbacks to its predecessors while standing well on its own. It takes well-loved tropes and successfully alters them while maintaining loyalty to the genre. Add in some eldritch deities, a cultish town secret, and a cop subplot, and NPMD becomes a melting pot of niches that come naturally to the eclectic story it tells.
The opening title, “High School is Killing Me,” directly ties into the idea of the teen’s struggle to survive high school, using violent language and choreography to perpetuate this notion. We’re also introduced to our three cliche-filled protagonists: sheltered and religious Grace Chastity, nervous nerd Pete Spankoffski, and rebellious party girl Stephanie Lauter.
Each character falls easily into a character type often found in slashers, but leans into them in a clever, self-aware way. Max shows a unique understanding bullies seldom have while also reiterating his status as a high school menace, as seen in “Literal Monster,” a song structured to show the nerds, the prey, being hunted by Max, the predator.
Grace Chastity, the only true nerdy prude of the friend group, kickstarts the rest of the story. Her forbidden attraction to Max drives her to prank him and subsequently hide his body, as seen in the cleverly named songs “Bully the Bully” and “Bury the Bully.” She ropes the other nerds into keeping quiet about their accidental manslaughter, a reference to I Know What You Did Last Summer with a nerdy twist.
Despite it leaning on the humorous aspect of horror-comedy, NPMD easily hits several emotional beats, making you care for Max’s victims with little time on stage. While Pete and Stephanie’s budding relationship begins as a cute distraction from the sex-crazed felonies Grace has been committing, it grows into something far larger than the climax of the musical hinges upon; they’re given the choice to sacrifice what they love most in order to stop Max, and what they cherish most is each other. Fair warning, however: “Cool as I Think I Am (Reprise)” will make you bawl your eyes out.
Nerdy Prudes Must Die is a love letter to teen slashers, displaying the evolution the genre has had over the decades in musical form. It is available to watch in its entirety on YouTube.
Do you love zombie movies, but wish there was more romance? Well, then Zombie Prom is the musical for you! Taking place in the radioactive 50s, this zom-com has everything, from a forbidden love story, science fiction undertones, and thrilling plot twists.
High school sweethearts Toffee and Jonny are torn apart after their secret relationship is exposed by their parents, who don’t want their lovely straight-and-narrow daughter involved with a reckless bad boy. Distraught after their break up, Jonny drives his motorcycle into a nuclear plant outside of town, and returns to school weeks later glowing green and wanting to win Toffee’s heart back. He has a newfound determination to graduate, and to take Toffee to prom as a declaration of his undying love.
Although she’s unsure whether this revived relationship will work, Toffee’s friends urge her to try it if she loves him, even if he’s more green than guy. That, and the aptly named principal Mrs. Strict has created a rule just for Jonny to complicate their plans: no zombies at school! All the while, a local reporter digs into Jonny’s undead past that is sure to bring to life a long dead secret.
This musical is perfect for lovers of 50’s rock and romcom lovers with a taste for horror. If you’re interested, be sure to come and see Zombie Prom live! Columbia Children’s Theatre and Freeway Music have partnered up to give you a performance to die for. Be sure to keep an eye out for more details the closer the date becomes!

Many artists evolve from their old styles as they mature in their music, oftentimes causing uproar within the fanbases. Popularity can stagnate or even decline when they change styles, even if it is for the better. The Front Bottoms are no strangers to this, but they push through and allow themselves to change as creators, and all of us avid listeners are grateful for it.
This New Jersey-born rock band is best known for their earlier works with heavy acoustic guitar, messy drums, and raw vocals that cemented Midwest emo into the musical zeitgeist. Since then, though, they’ve leaned more towards the indie scene, switching the acoustic guitar for an electric one and cleaning up the sound while keeping the same intricacies in their lyrics that always enticed people to listen closely.
Their newest album, You Are Who You Hang Out With, dropped last week, and it looks back into their previous styles with their first three singles released in anticipation. “Emotional” starts off the album with a bang, an eclectic indie-pop single that takes from their style from their previous album, In Sickness & In Flames. The next two, “Outlook” and “Punching Bag,” look back into their discography, the sound reminiscent of Talon of the Hawk and Back on Top, two albums that forged their style into the hearts of fans. These two songs talk about getting stuck in the past and using music as an escape.
The rest of the songs showcase the new sound first experimented with in Going Grey and developed with each consecutive album. The Front Bottoms distort the vocals to stay true to the shaky novelty of their earliest songs and keep the same vibes they had before: happy sound, sad lyrics.
You Are Who You Hang Out With is a great addition to The Front Bottoms’ extensive discography, paying respect to their beloved past works while looking forward to newer, better things. It perfectly encapsulates the struggle of growing out an important phase of your life despite understanding it’s for the better because there are some things better left in the past and revisited on occasion rather than becoming stuck in the past with what’s familiar and comfortable. With this powerhouse of an album, The Front Bottoms is only going up from here, as they always have been.
You can listen to You Are Who You Hang Out With on Spotify, YouTube, and anywhere else you stream music.
As the tail end of summer approaches, the music scene is bursting at the seams with released singles, EPs, and upcoming albums. Indie-rock soloist Briston Maroney contributes to this new flow of welcomed songs with a two-sided single, “Detonator,” along with its companion piece, “The Idea.” This pair of songs perfectly set up the tone and voice we’ll be hearing in Maroney’s sophomore album, Ultrapure, that comes out on September 22nd, along with two other singles that all tell a story about making the most of your youth despite the circumstances.
“Detonator” tells the story about someone discovering they’re in love with a friend who’s still hung up on their ex, though you wouldn’t realize that on your first listen. This summery song carries a twinge of sadness hidden by airy guitar and the steady tempo courtesy of the drums. It encapsulates the feeling of late nights and short-lived summer romances, perfect for blasting with your windows down on the way to the beach for a midnight swim.
On the other end, “The Idea” focuses more on acoustics, piano and gentle vocals. It evokes a nostalgia that directly opposes “Detonator” yet ties neatly into the suspected theme of this album: the realization that, eventually, all the good and bad that comes with being young, will be in the past. This song comes off more reminiscent than the previous but holds similar themes of young love and the tribulations that come with growing up.
His other two recent releases, “Sunburn Fades” and “Body,” both featured on Ultrapure, carry the theme of the struggle that young adults go through, balancing the beginnings of their lives while also trying to hold onto their youth as long as they get it. “Sunburn Fades” is more broken down—acoustic guitar and Maroney’s signature voice taking the forefront—while “Body” carries an airy tone similar to “Detonator.”
Ultrapure releases closer to the middle of autumn, perfect timing for school’s return right around the corner, but these songs can be played year round. After all, there’s never a bad time to think about your youth and appreciate the time you have left while also reminiscing on the time that’s already past. And the perfect album will be waiting for you to play on repeat. Don’t forget to preorder Ultrapure before the opportunity passes you by.
Local bands have more opportunities to expand upon their music than larger, established musicians. No record labels means nobody’s holding them back. The wandering between college town bars gives them room to experiment with instruments, lyrics, and the way their music is found and consumed.
Clay Dixon and the Piccadillies, a Floridian folk band, takes advantage of their tight-knit notoriety to create a compelling narrative freely and without fear. They are storytellers first, musicians second, and both skills are tied together lovingly in their latest EP, “Walking Uphill with Seedy Beady.”
This immersive EP follows the titular Seedy Beady (who’s just the singer with a chipper Scottish accent) as they guide the listener through an intentionally disjointed story. It is a quiet but epic tale presented to the band’s audience as a ‘lost media’ that was discovered in a thrifted jacket, adding a layer of mystery to the EP.
Most musicians would tease an album with the drop of a single here and there. Their intent is transparent: listen to their songs, and eagerly await the upcoming album. The Piccadillies, however, push past that and envelope each song with history. The experience extends beyond the album.
There are not many other bands who can boast about well-written limericks on their discography, or the intrigue surrounding the story being told from the pocket of a corduroy jacket. The Piccadillies maintain complete creative control with this niche take. Sometimes they sing, sometimes they speak directly to the listener while the instrumental plays in the background. Most times, it’s a bit of both.
“Wasp’s Nest Limerick” is a contemplation on limericks, their simple structure, and the possibilities that lie within writing without the ambition to impress but simply to create, all over a plucky banjo. Regarding “Guessing Limerick” as its partner song neatly ties together the as it’s written entirely of limerick stanzas.
The Piccadillies take a type of poetry hardly taken seriously and reshape it into something worthy of song-form. They experiment with lyrics and tone, though mostly maintain the airy tone established in the first track. Each song has the crackle of static over it, aging it and adding to the lyric’s otherworldliness. Despite the unique structure, the singer grounds you, taking you by the hand to guide you through this world.
Not every song is an actual song. “unlisted_track” is so eerie with its electronic buildup it feels out of place among the other songs. However, this is another way the band goes against tradition—they take your expectations and twist them on their head to bring you a piano-backed poem overloaded with lore.
“Walking Uphill with Seedy Beady” is imbued with passion, not just for music but for storytelling in any form. If they were internationally acclaimed, The Piccadillies would likely be trapped by contracts and expectations, but the reputation of a local band is ever changing. They easily float along the surface of popularity, with a following to appreciate and support their art, but still remaining small enough to have the freedom to make something as immersive as this EP.
On April 7th, indie darling Ricky Montgomery released a new single to tease the nearing release of his unnamed sophomore album. While “Eraser” talks about Montgomery’s experiences with isolation during the height of the pandemic, the sound itself is a turning point for his career as he begins to establish his musical voice outside of his Tik Tok and Vine popularity.
Originally a small artist who bounced between bands in West St. Louis County, Ricky Montgomery found a bout of success in Vine with funny short videos and used that popularity to bring attention to his solo work. He released his first EP, “Caught on the Moon,” and a few years later, his debut album “Montgomery Ricky.” However, while he had a loyal fanbase waiting for any new projects, it wasn’t until the early days of the pandemic that his music truly got the attention he earned.
Tik Tok, which has become known for taking small artists and picking them off the ground, discovered “Mr. Loverman,” a song from Ricky Montgomery’s first album, and immediately dragged it to the spotlight, bringing a second renaissance in his musical career. It couldn’t be helped that this song and many others from his debut album became associated with many groups in fan culture, and the power of fans is one to be reckoned with, as Ricky Montgomery grew from niche indie singer to borderline mainstream in exponential expediency.
Ever since this, he’s done many things with this newfound fame, including signing a record deal with Warner Bros and releasing a second EP, all while working on his second album, which has yet to be announced but has been relentlessly teased on his social media.
Following the highly anticipated drop of this second album, Ricky Montgomery has released a single: “Eraser.” This newest title under his belt diverges from his normal sound, leaning less into the rock side of indie rock and more into a mellow, electronic indie vibe that feels more like a daydream than a heart wrenching song to sing to at three am on the highway.
Even though the sound is new and experimental for someone such as him, Ricky Montgomery’s career has been filled with divergences. He’s incredibly well rounded in musical genres, and while he doesn’t wander too far from indie, his talents allow him to venture off into different sounds while maintaining the core of who he is.
Even with simpler stanzas making up “Eraser,” Ricky Montgomery keeps the quiet prose of his lyrics that has always resonated with people, even if the inspirations for those lyrics aren’t universal experiences. He balances bite-sized metaphors with that steady pace of the drums that neatly walks the line between somber and uplifting he’s been doing since his debut.
Now that he has the backing of a record label, this well-crafted single is just a taste of what’s to come, and everyone will be waiting eagerly for his next album’s release.